Photography allows us to precisely define the duration of a captured moment. From a frozen fraction of a second to capturing a period of several hours, we can operate almost steplessly and achieve the intended effect as desired.
We transfer this information, collected along the timeline, into a single image. Viewers, however, can then choose whether to inspect all the details precisely or simply let the overall impression sink in for a few seconds. With a long exposure, you can achieve great photographic effects!
During the day, photo filters like ND filters and graduated ND filters are extremely helpful, which we will discuss separately later. Essentially, for a convincing long exposure, we need special equipment and important accessories to prevent blurring due to camera shake.

What is long exposure photography?
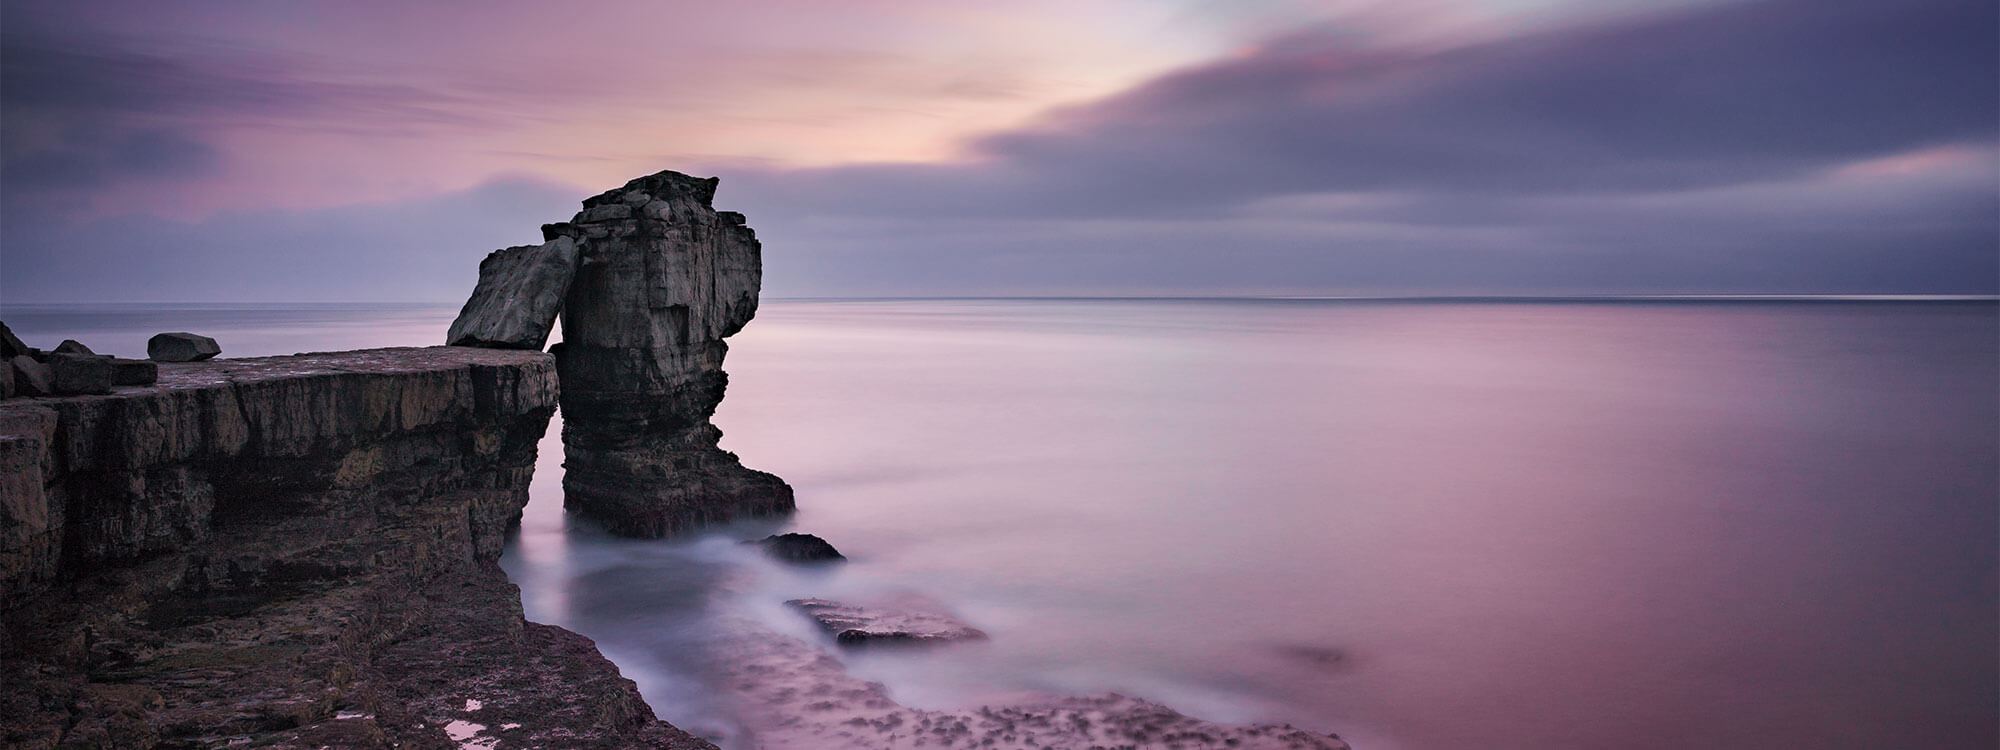
With long exposures, we utilize the possibilities of freely choosing the exposure time for entirely unique effects or messages. Because mirror-smooth seas, the streaking motion of clouds, light trails, the contrasts of motionless objects in the image, and completely people-, animal-, and vehicle-free images are not motifs that one can see as a casual observer.
They move very strongly into the realm of surrealism or expressionism.

Indeed, the human eye rarely perceives such drama as is possible with a longer exposed image.
Long exposures also often serve as a test for beginners who need to familiarize themselves with the fact that even the most sober photography can only ever be an interpretation, but never a true reflection of reality. But let's leave the philosophical corner and turn to the concrete requirements of long exposure photography:
Which exposure times do I use for long exposures?
Most photographers understand long exposures to mean shots with exposure times of several seconds. However, the time from which one can no longer take a photo without camera shake from the hand is significantly shorter.
For action and sports photography, for example, we need fast lenses to reduce the shutter speed enough to freeze the moment. For long exposures, however, tripods are absolutely necessary.
Without an image stabilizer, you can hold your camera steady for an exposure time equal to the reciprocal of the focal length in 35mm format. If you shoot with a standard lens that has a 50 mm focal length, you can hand-hold for 1/50 second.
If you use a telephoto lens with a 200 mm focal length, only 1/200 second is possible handheld. Longer times require a tripod. An electronic image stabilizer gives you some leeway, usually two or three stops. Each stop doubles the possible exposure time. For example, 1/60 second becomes 1/30 second. To venture into the realm of true long exposures, however, you can easily exceed the second and even minute limits, at which point the aperture-shutter speed rule of thumb no longer helps.
What equipment do I need for long exposures?
First, of course, a camera that actually allows exposure times beyond the second range.

As a professional, you probably take this for granted, but beginners should make sure this option is available when they want to purchase their first camera.
Furthermore, it should be possible to trigger the camera with a remote control and offer stepless adjustment of the exposure time. Mirror pre-release in DSLR cameras ensures that as few mechanical, camera-internal influencing factors as possible negatively affect image sharpness. Even the mirror flipping up at the moment of release can cause a minimal tremor that blurs an otherwise sharply focused subject.
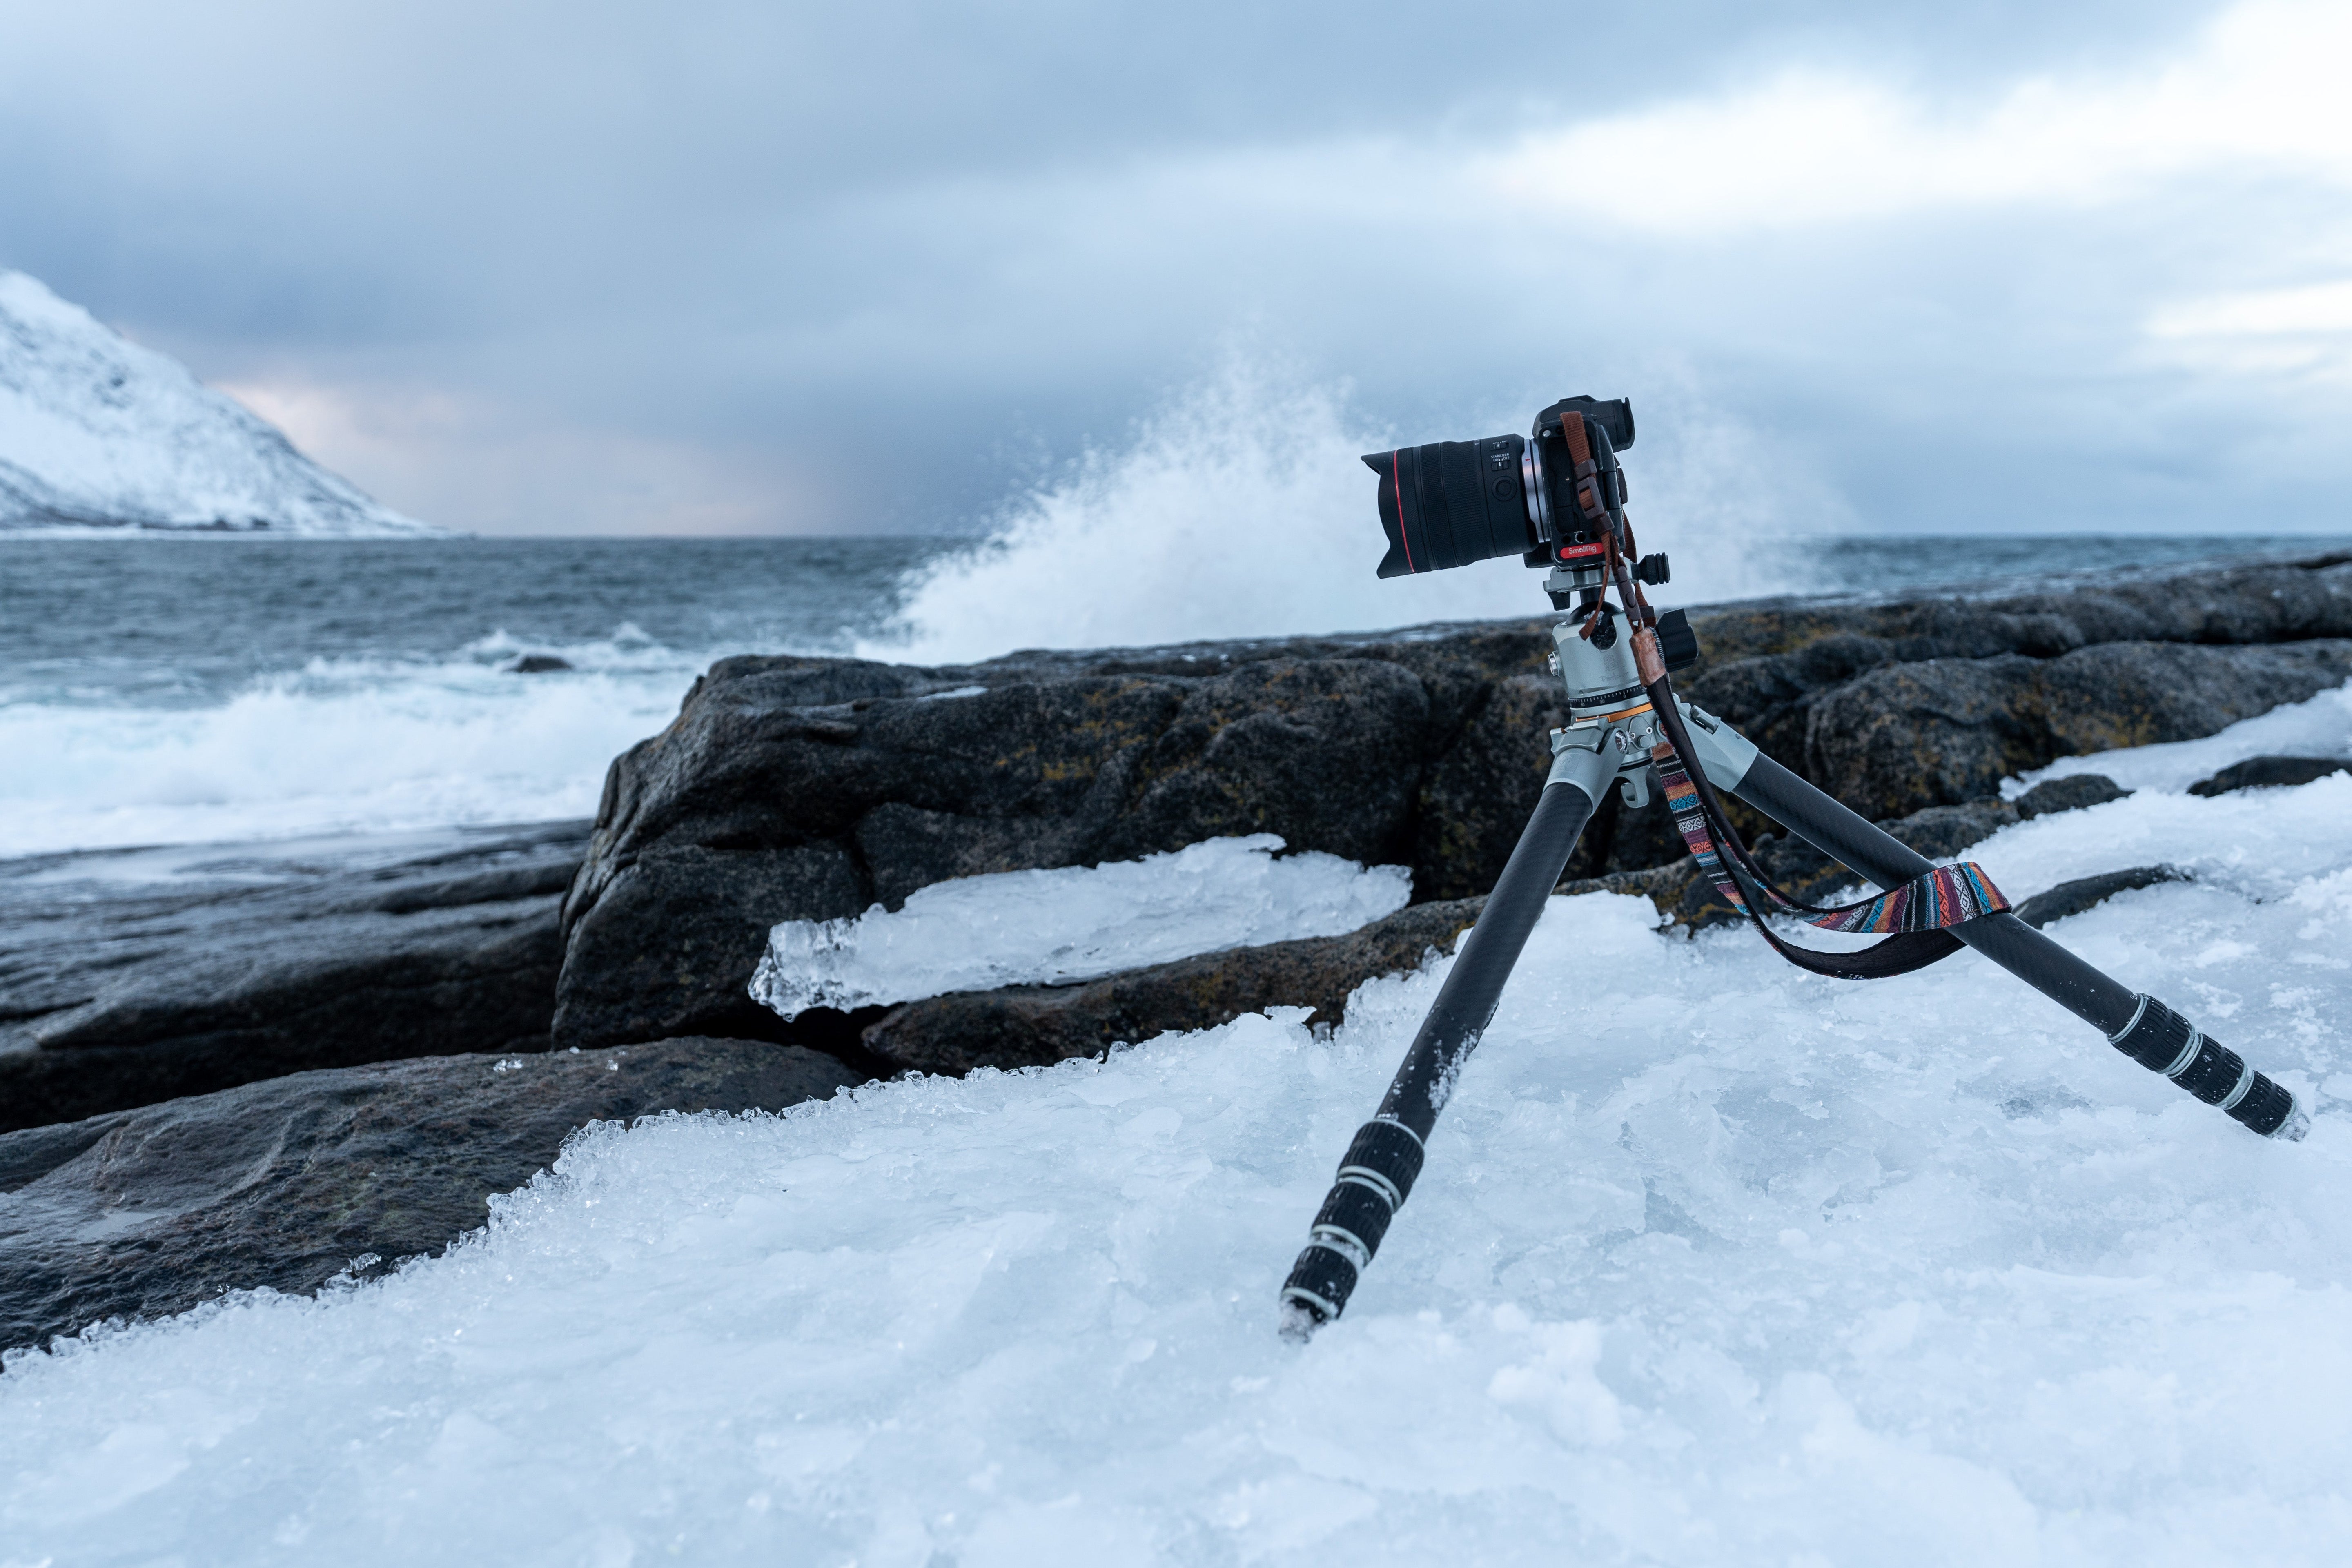
True long exposures of several seconds or even minutes cannot be achieved handheld, even with a modern stabilizer. In addition to the camera, a stable tripod is therefore obligatory.
What should I look for in a tripod for long exposures?
A solid tripod is therefore a basic prerequisite. You should under no circumstances skimp here, as without a secure and stable stand, neither a high-end camera nor the most expensive filters make sense. Because a sensible and durable outdoor tripod can also be used easily in the studio and for many other photographic applications.

Ideally, it should have an appropriate tripod shoulder height and width. This not only guarantees the widest possible radius for the extended tripod legs, but also ensures that your back doesn't suffer from constant bending or that you can focus on the desired subject even over obstacles. Make sure that the tripod and tripod head are adequately sized for the weight of your camera. The tripod legs should extend far enough so that you only need the center column in exceptional cases, as it is much more susceptible to vibrations. Do not include the option of extending the center column to its full height from the outset. This only serves as an emergency solution and should not be extended more than a hand's breadth.
If you travel a lot on foot, you should opt for a carbon tripod model; this material significantly reduces overall weight and vibrations while still offering high stability and load capacity.
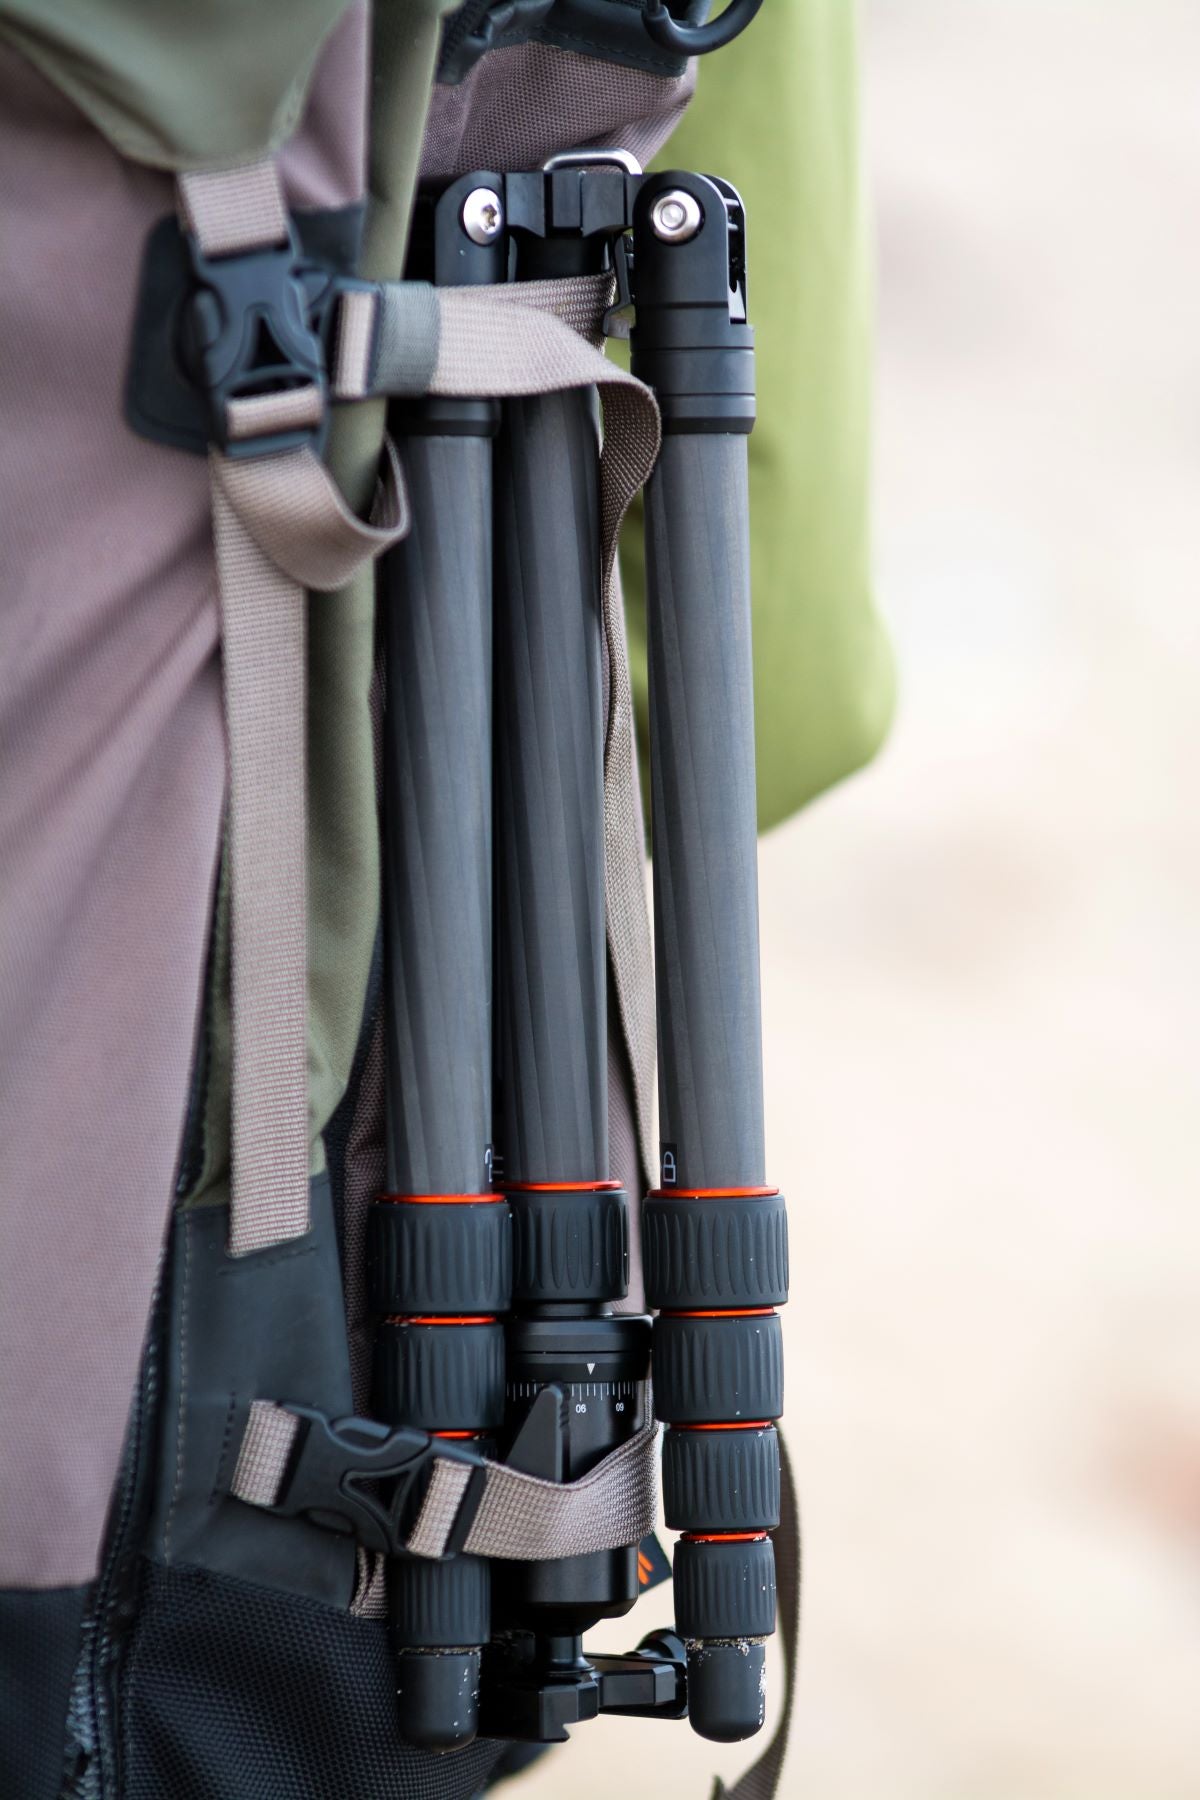
A hook at the bottom of the center column allows you to attach additional weight (e.g., a camera bag or backpack) to increase stability and lower the center of gravity. The tripod head should be able to swivel 360 degrees and also be lightweight and stable enough to hold the camera vibration-free and at the exact same height for extended periods.
This brings us to the third equipment area that is important for long exposures:
Which filters do I need for long exposures?
Here, filters are often used that necessitate or enable long exposures during the day. ND filters are what allow you to reduce the light entering through the lens enough to enter the long exposure range and take more atmospheric pictures.
Depending on your requirements and budget, there are two systems:
Round filters are suitable for beginners and do not require separate filter holders, whereas rectangular filters are easier to combine and represent the high-quality solution in this discipline. Perhaps start with a round filter of medium intensity, possibly also with a variable ND round filter. Once you've developed an interest in filter photography and long exposure, the potential of high-quality rectangular filters will be available to you. These can be mounted onto different lens diameters with filter holders and adapters .
If you have opted for round filters, you should ensure that the material of the filter rings can expand or contract when you expose your photo equipment to temperature differences. In the worst case, filters may temporarily become impossible to unscrew. To permanently avoid this risk, Rollei Extremium round filters are a good choice, as their titanium rings resist even extreme temperature changes.
Rectangular filters can be easily combined; the Rollei filter holders accommodate up to three filters. They can be infinitely shifted vertically against each other, and the rotatable filter holder allows any desired angle.

You should not underestimate the vibrations that you transmit to the camera simply by pressing the shutter button. It usually takes a short moment for the system to settle down again. That's why remote releases are an excellent investment.
It doesn't matter whether you choose a wireless or wired model.

Please also make sure that the viewfinder of your DSLR camera should be covered. Because with longer exposure times, even the minimal light that can fall through the viewfinder onto the sensor causes unwanted spots in the image, which cannot be explained without knowing this context and quickly frustrate beginners.
Black electrical tape can also be used, but this quickly becomes tedious in the long run. Alternatively, for cameras with a removable viewfinder cap, a second one can be obtained as a replacement and covered with tape – a good interim solution if no alternative is available.
What camera settings do I need to pay attention to?
Good tripod, remote release, and still blurry pictures? Don't worry, it's not your photographic skills. If you take your photos with a DSLR camera, the movement of the swinging mirror just before the shot causes strong vibrations in the camera.
Our tip: Look for mirror lock-up in the camera menu. Similar to the self-timer, there is a delay between the mirror flipping up and the actual shot, during which the camera can settle down. Switching to live view also prevents mirror slap.
All current camera models now offer this option – the resolution and color fidelity of the Live View mode already allow for a good assessment of the later image. The range of mirrorless high-end cameras suitable for long exposures is also constantly increasing. Another advantage of this camera category: compact dimensions.
What subject is suitable for long exposure?
Now you have the necessary equipment, know what to look out for, and are looking for your first subject for long exposure. When choosing your subject, there are two different categories:
- Subjects during the day
- Subjects at night
Let's start with the first category:
Daytime motifs
Flowing water or a crowd of people rushing around a still point – here you need to ensure that you achieve a long exposure time.

Close the aperture as much as possible (large aperture number) and lower the ISO sensitivity to the smallest value. If that's not enough to increase the exposure time to one second or more, an ND filter helps, which absorbs light without changing colors. At least one static subject element should be present. Otherwise, everything will be "in flux" and the interesting contrast between fixed and moving elements will not materialize.
Some elements of the subject completely change their optical appearance through long exposure.

A rough water surface becomes mirror-smooth or a streaky pattern, (with a polarizing filter also transparent) glass surface, clouds lose contrasts and ruggedness and become an imposing cloud formation.
If you want to add an extra touch of mystique to the image, you can also photograph in a crowded place that becomes completely deserted with a sufficiently long exposure, or where people are only vaguely visible.

In the upper image, one can discern the motion patterns: In the background, it's visible that people stood still during the exposure, in the front left, people moved a lot, and to the right by the reeds, people stood who moved around the tripod.
Night motifs
One possibility is to realize long exposure at night, because here you need long exposure times anyway due to the low ambient light. Particularly impressive are night shots that trace movements with lights that are not visible to the naked eye.

Headlights and taillights on a busy street, spinning carousels at a fair, and fireworks are typical subjects.

With a little skill, you can create your own light art with an LED lamp, a "lightsaber", or a sparkler. When photographing the starry sky, wait for a moonless night. If you want to try photographing lightning during a thunderstorm, stay in a building or car. There you are better protected from lightning strikes than in an open field or under trees.
An equally interesting and multifaceted "sub-category" in the field of long exposure photography is astro or star photography. Essential for capturing stars or our Milky Way is a location outside the "light domes" of urban centers. Typically, you need to move about 10 to 20 kilometers away from the center of light pollution to get the clearest possible view of the night sky. The best locations for astrophotography are near observatories and planetariums – which depend on a location that is as free as possible from light pollution.
For example, if your next vacation takes you to the Canary Islands, you should definitely pack your long exposure equipment!
Subjects for practice
The ideal location for an impressive long exposure shot has static and dynamic subject components that are roughly balanced in terms of tension, drama, and creative potential. It is important to remember that these images contradict the natural visual experience of the eye. But don't worry: over time, you will train your eye and find potentially rewarding locations for long exposure shots faster and more accurately.
To gain initial experience and success, highway bridges day and night, a subway tunnel with an approaching train, a stormy sky, or a stream with rapids are ideal.

As with any photographic discipline, the secret to success lies in having a thorough understanding of the optical effects and extensive practical experimentation. Practice makes perfect here too!
How do I approach long exposures?
Since the respective exposure time depends on the ambient conditions on site, every long exposure session begins with test shots and exposure tests.
It is important that you focus your lens before attaching the filter and then disable autofocus.

Because experience shows that even with moderate ND filters, you can no longer see the actual subject clearly - the autofocus often starts to jump from one area to another because it can no longer find a usable reference point. Then switch your camera to manual or bulb mode or control the exposure time completely via the remote control.
The right location for a long exposure has been found when you can act completely undisturbed there - and are not in anyone's way.

Narrow alleys, emergency exits or busy squares with passers-by are therefore less suitable. After you have also deactivated the image stabilizer and mounted your filters, simply take a few test shots. Play with the ISO, time and aperture values and gradually approach the desired result. Then evaluate the result on the histogram.
A reasonable result is achieved with a histogram that is not cut off on the left and has no significant peaks on the right - but still covers the entire spectrum.
Tips for impressive long exposures
- Use wide-angle lenses with fixed focal lengths → wide angle of view offers a good view of the subject, short focal lengths offer a large depth of field
- Put as much effort as possible into initial focusing → movement of the dynamic image component is responsible for blur in the image
- Soft and flowing movements (water, clouds) work great in contrast with static elements (mountains, stones, trees, buildings)
- Consider which filter strengths you want to combine
- Always have a polarizing filter with you, which can intensify blue and green tones and enhance contrasts
- If reflective water or glass surfaces are desired → CPL filters can facilitate this

Bonus tip: Reduce image noise in long exposure
As the exposure time increases, the sensor of a digital camera heats up. Cameras therefore usually have a limit for the longest possible exposure time.
Nevertheless, increased image noise and so-called hot pixels occur. Activate long exposure noise reduction in your camera. The camera then takes an additional image with the shutter closed and calculates out disturbing pixels based on this comparison image. Please note, however, that your camera will be blocked for the duration of the second shot. So you cannot take pictures in quick succession. However, this option is usually not required for extended exposure times, the use of filters and remote triggers.
Conclusion
Long exposures are certainly one of the most exciting and creative photographic possibilities - also because our eye cannot produce the resulting effects itself.

Share:
Portrait Photography for Beginners: A Guide by Mario Dirks
USA Travel California: Top 5 Motifs for Photos with Rectangular Filters