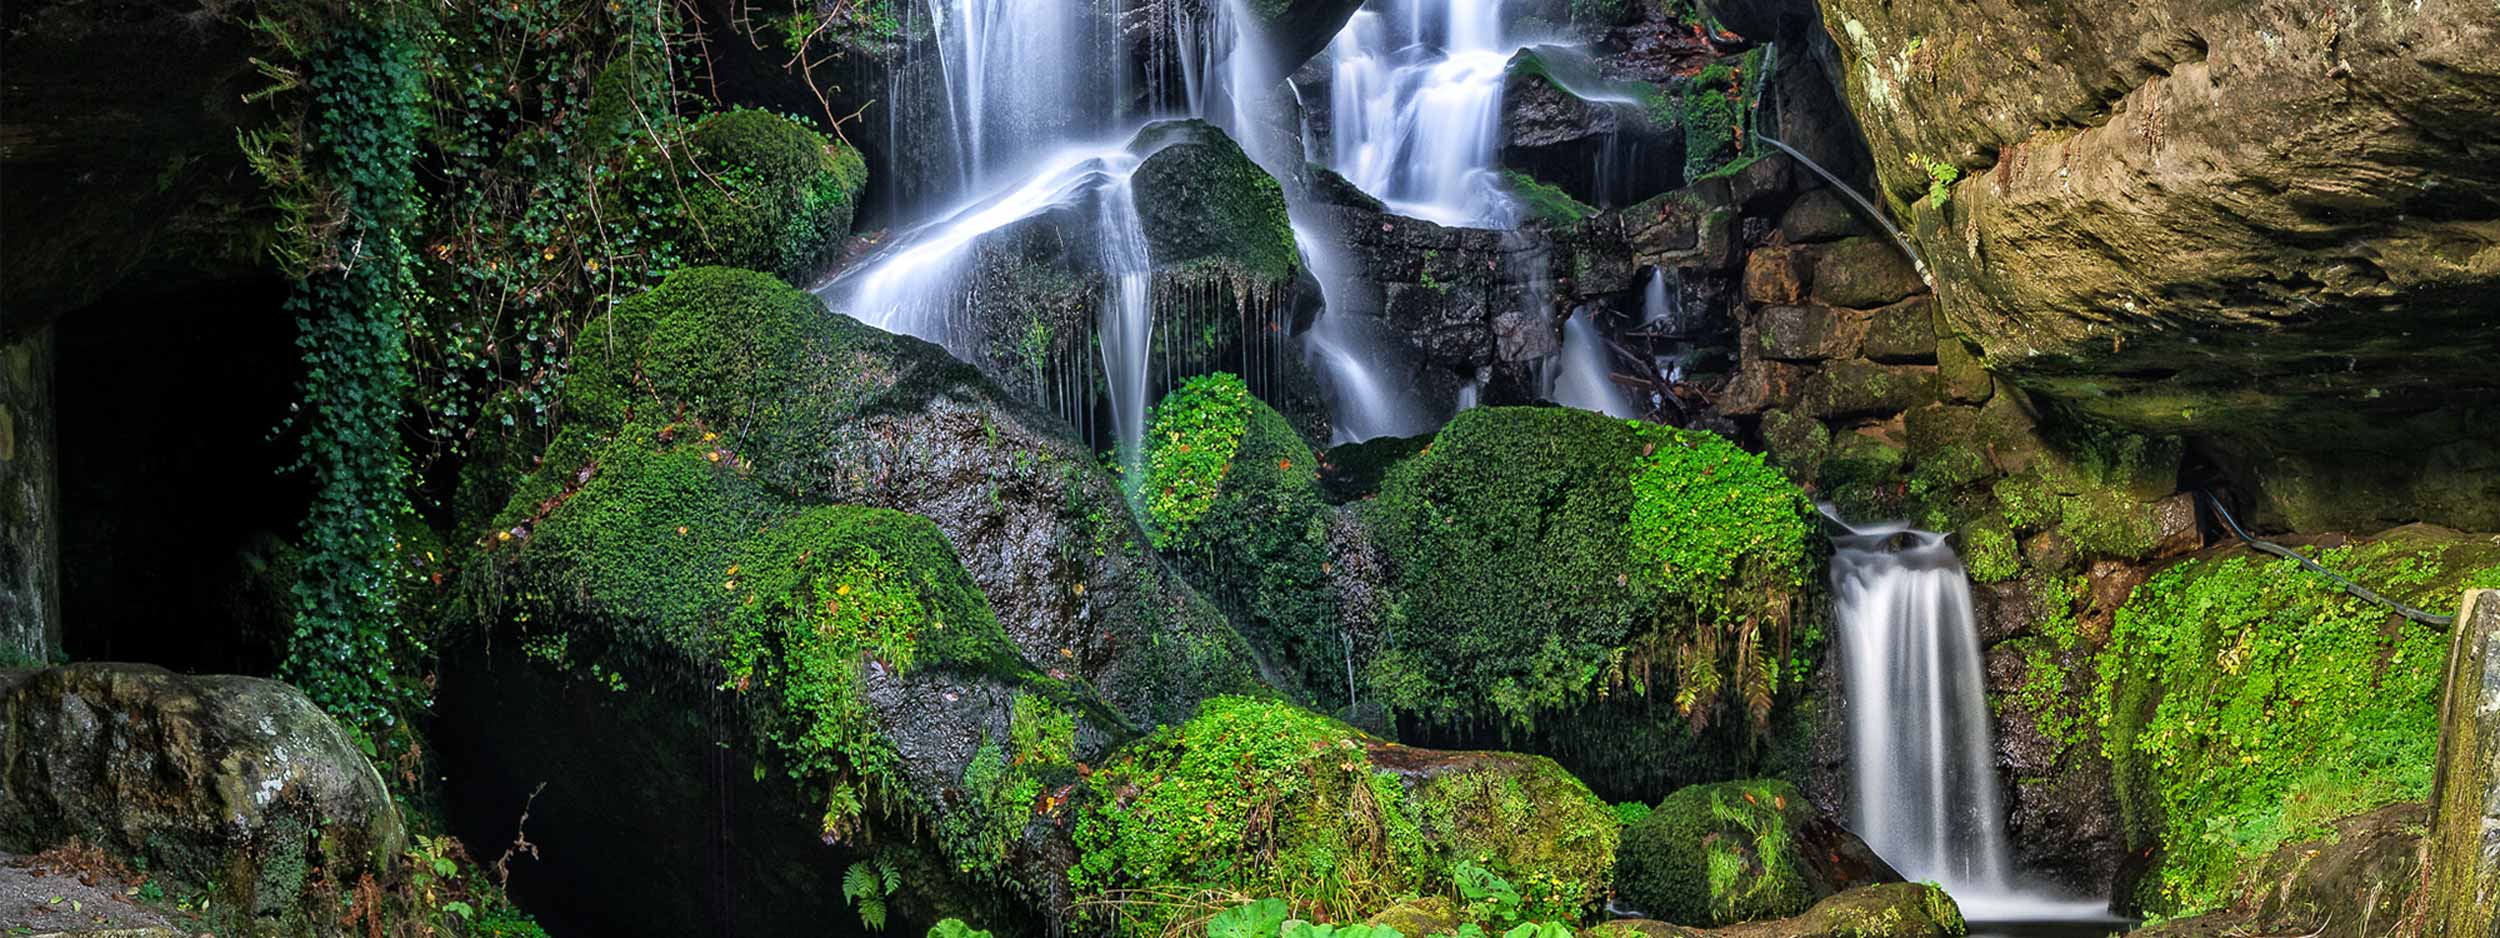
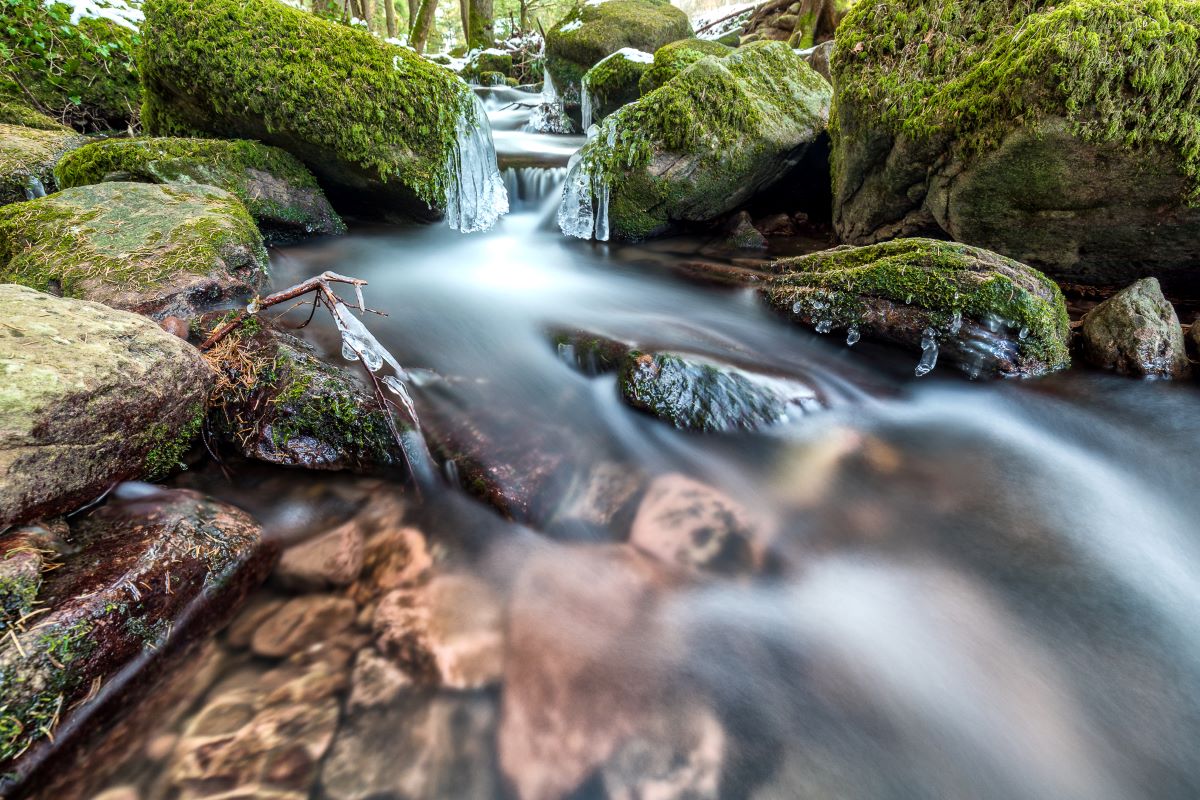
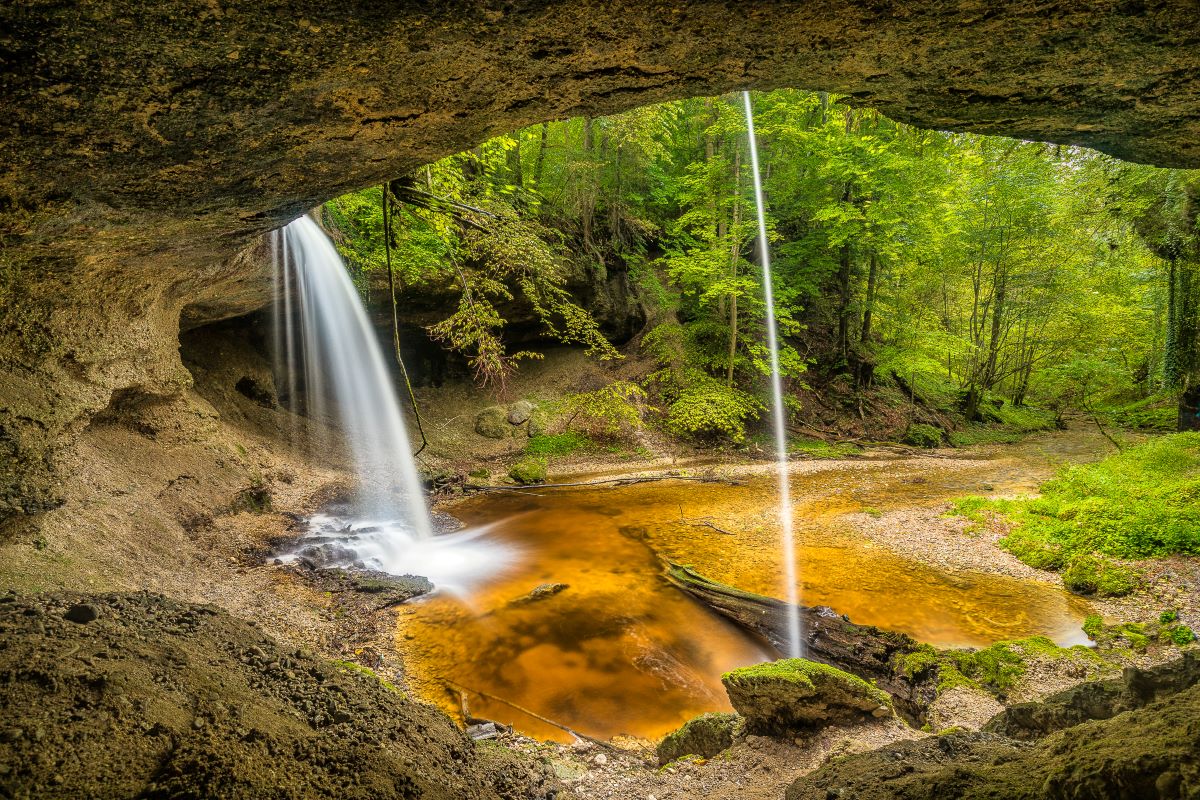
Anyone serious about getting into landscape photography will eventually need ND filters (Neutral Density filters) – for example, when a waterfall is the subject. The reason: With the extended exposure time that an ND filter allows, movements in the image blur in an almost surreal way. Long exposure times become possible even in broad daylight. We conducted an interview with professional photographer Armin Leins from Marker92 Photography, who answered 12 important questions for us about photography with ND filters.
1. What does an ND filter do?
2. Why do I use an ND filter?
3. What accessories do I need to photograph waterfalls with an ND filter?
4. How do I photograph a waterfall with an ND filter?
5. What other subjects are suitable for photos with an ND filter?
6. When do I use which filter, especially with graduated filters?
7. How do I clean filters?
8. What is a good filter holder?
9. How do I calculate exposure times?
10. How do I focus when the filter is already in the holder?
11. Where do I set the focus point?
12. What mistakes can be made and how can they be avoided?

1. What does an ND filter do?
It simply reduces the amount of light that hits the camera sensor. Depending on its strength, it acts similarly to sunglasses or welding goggles. This is desirable to achieve longer exposure times.
2. Why do I use an ND filter?
There are several use cases:
- For example, to render flowing water in a stream in a silky way.
- Especially with a waterfall (which can be made more interesting) or a lake (which can be smoothed out with several seconds of exposure time).
- In city photography, for example, if I want to photograph a tourist square and can make people "disappear" with the help of an ND filter (Neutral Density filter).
- Or to let clouds drift across the image (wiping effect). Generally, when I need longer exposure times during the day or want a specific image effect.
- Or if I'm in very sunny areas like Florida and want to do a model shoot.
Then I also take a light ND filter with me so that I can achieve a sensible exposure time even with a deliberately wide aperture (e.g., f1.2 or f1.4).

3. What accessories do I need to photograph waterfalls with an ND filter?
For example, I also use an iPad that displays my camera screen. When I do something like that, there's often a lot of ambient light during the day, and of course, I don't see much on the camera's rather small display. Then it's difficult to properly judge the effect of a polarizing or graduated filter.
If I set the polarizing filter incorrectly, the blue sky could become very splotchy, which often can only be seen correctly on the computer at home. Many photographers struggle to set the polarizing filter correctly on location.
Meanwhile, it's becoming more and more common to see my workshop participants also carrying tablets, allowing them to directly review the results on the spot and, most importantly, very precisely control the effect of the filters used.
Especially graduated filters should be positioned very precisely. All you need is a Wi-Fi-enabled camera and an app that can display the camera's live view image on a tablet or smartphone.
This allows you to see the scene and the effect of the filters better, firstly because the image is larger, and secondly, even in difficult lighting conditions, you can easily position the tablet so that you can still clearly see and evaluate the preview image of the subject.

4. How do I photograph a waterfall with an ND filter?
To prevent a waterfall from appearing too soft and smooth, the exposure time should be between 1 and 5 seconds, depending on the water flow speed.
The ND filter is chosen so that these times can be achieved. The exposure time can be calculated manually, using tables, or with an app. For example, the free Rolleimoments app, available in the iOS App Store and Google PlayStore.
However, you can even more easily set the correct exposure time using the histogram. If all bright and dark image areas are covered within the histogram and there are no outliers to the right (too bright) or left (too dark), I have a correctly exposed image with optimal utilization of the dynamic range offered by the camera sensor, so that I still have reserves in post-processing without significant loss of quality.
However, this method only works for most cameras up to a maximum exposure time of 30 seconds. If the time exceeds that, the specific histogram can only be seen after the shutter has been released. But that would be too long for a waterfall anyway (1-5 seconds exposure time).
So, with an ND filter, I photograph a waterfall as follows:
- Set up the camera on the tripod for the desired image section.
- Insert the filter andposition it correctly.
- Adjust exposure time
- Check histogram
- Trigger the camera
Either with a wired remote release or wirelessly; I usually trigger via iPad or mobile phone.
Pre-triggering with a 2 or 10-second delay is also possible, of course.
Afterwards, post-processing on the PC follows.
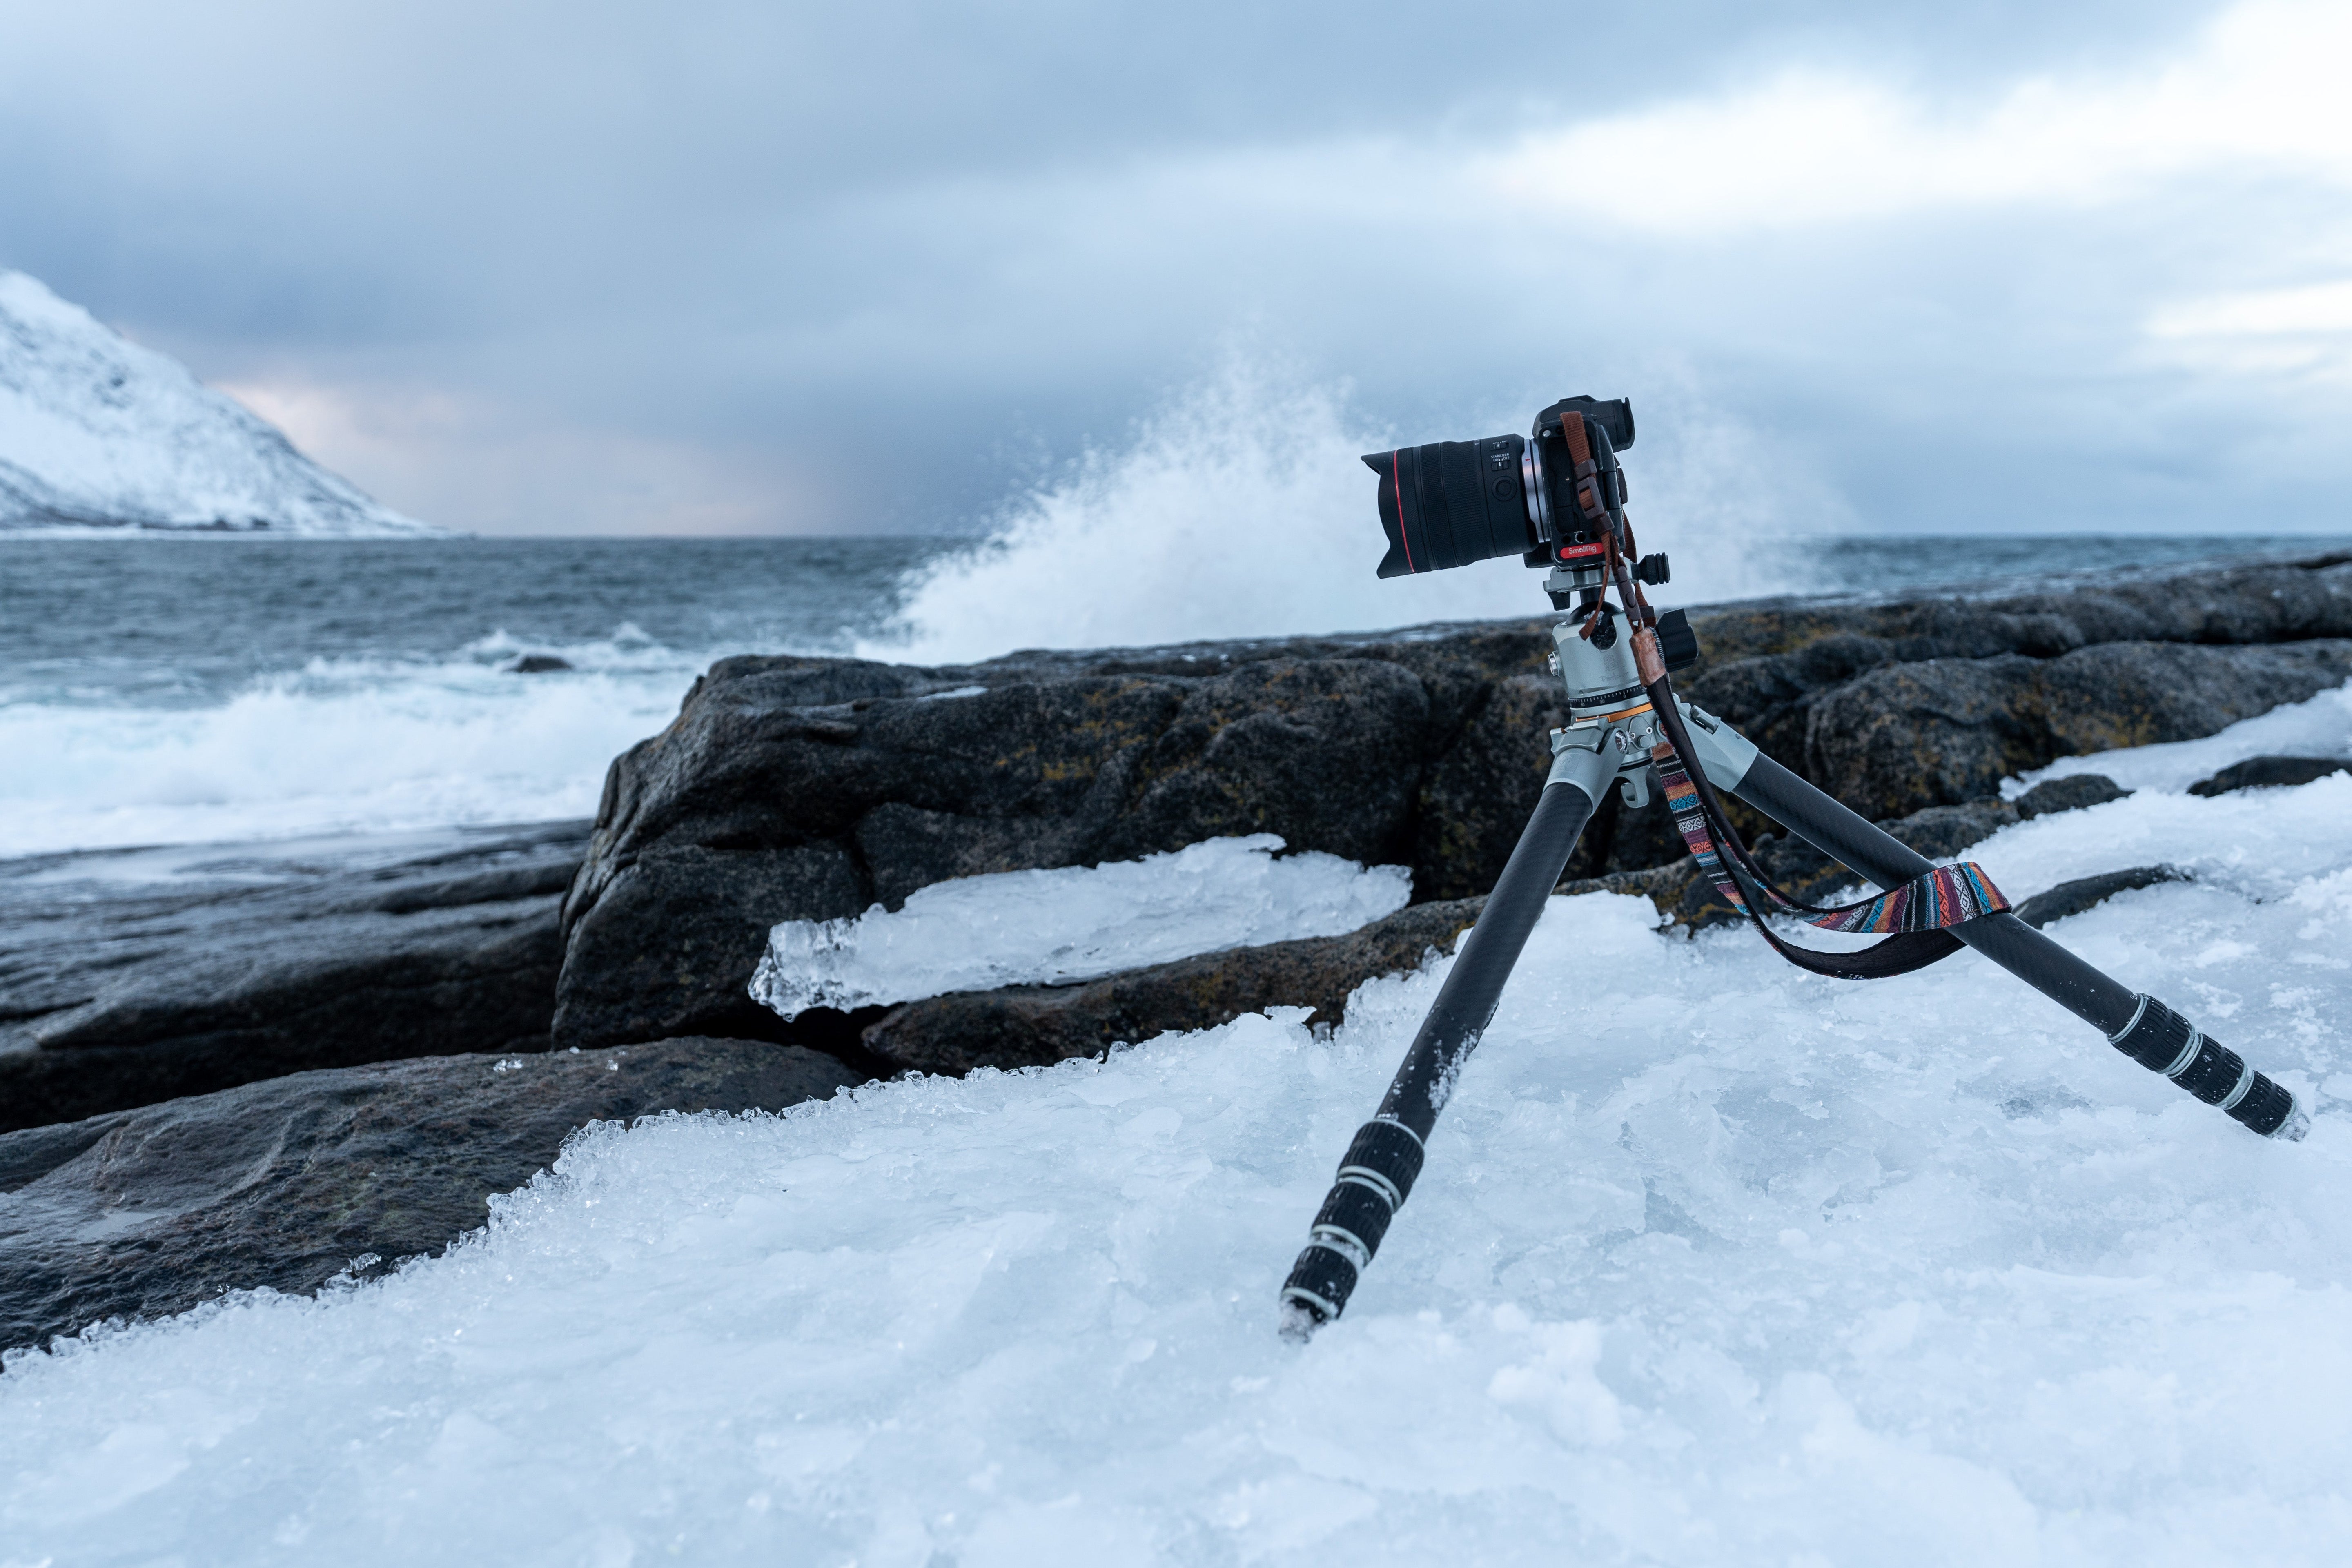
It is particularly important that the camera remains absolutely still, and therefore a very good tripod should be used. Very often, insufficient image results are due to the use of an unsuitable tripod.
5. What other subjects are suitable for photos with an ND filter?
Particularly suitable are:
- Urban shots of squares where passing people should not be visible,
- Waterfalls, and
- Generally, subjects with clouds and water.
Water often needs to be smoothed out a bit, and clouds should be allowed to drift across the sky. By additionally using graduated ND filters, you try to compensate for a too high dynamic range in the image.
For example, when you have a very bright sky and at the same time very dark parts of the image, like mountains, in the picture. Without a graduated ND filter, you couldn't properly expose the entire image. If you expose the dark parts of the image correctly, the sky would be too bright and blown out without any structure.
Conversely, the sky would be properly exposed, but the dark parts of the image would be completely black and also without structure. Graduated ND filters are very important in landscape photography and make it possible to control the often very high dynamic range in the subject.

6. When do I use which filter, especially with graduated filters?
Mostly this is quite self-explanatory; graduated filters are chosen according to the prevailing motif situation. For example, at the sea at sunset with a straight horizon, you very often use Reverse Graduated ND Filters (or alternatively filters with a hard transition) to adjust the very bright horizon (with the setting sun).
Otherwise, filters with a soft transition are mostly used, depending on the image effect you want to achieve. I myself really like a rather bright foreground and therefore often use Medium Graduated ND Filters, which darken a bit more towards the center. And sometimes you simply try out different strengths and types of transitions if you have enough time to deliberately get different exposure variations.
The strength of the graduated filters is adjusted to the dynamic range present in the subject. For large differences between bright and dark image areas, stronger filters are chosen; for smaller differences in brightness, a less powerful graduated filter is used accordingly.

7. How do I clean filters?
Normally, simply with a good microfiber cloth; for heavier soiling, also with special filter cleaners. I myself exclusively use filters with a very good coating that are also very easy to clean on site, whether it's
- saltwater,
- dirt, or
- fingerprints
to remove.
8. What makes a good filter holder?
The integrated polarizing filter must be easily adjustable, especially when other filters are already inserted. At least you should be able to combine
- an ND,
- a GND, and
- a polarizing filter
The rectangular filters should be securely fixed, yet also easily movable (graduated filters) and present no problem in handling, even in colder temperatures (with gloves).
A filter holder should also be absolutely light-tight, which, unfortunately, is not the case with all of them.

9. How do I calculate exposure times?
It's quite simple, for example, using an app (Rolleimoments). However, for exposure times up to 30 seconds, I recommend using the histogram.
10. How do I focus when the filter is already in the holder?
With modern cameras, autofocus can still work quite well even with relatively little light reaching the sensor. If there's too little light, you can use an LED headlamp as an aid, for example. You shine it on the desired autofocus point, and in most cases, the camera can then focus.
Alternatively, remove the filter attachment – which is very easy with good filter holders – and focus, set the lens or camera to manual focus, and then reattach the filter attachment. Of course, the focus must not be changed after that.
Finally, you can also focus completely manually. On mirrorless cameras, the integrated focus peaking helps with this, or you can use the distance scale on the lens if you can't properly see the sharpness in the viewfinder or on the display.
11. Where do I set the focus point?
It's clear. For landscape images, I want to achieve maximum depth of field, so I focus very close in the foreground. Because I generally use very wide-angle lenses, which inherently have a large depth of field, the image is then sharp throughout.
If you – as many do – focus more on the center of the image or the main subject, the foreground will be out of focus, and you lose a sense of depth that is quite important in landscape images.
If I have subjects in the image that extend from very close to very deep into the image, such as a very long jetty on a lake, it may be necessary to take several shots with different focus points. These would then have to be composited in post-processing with suitable software to achieve continuous sharpness.
As a rule, however, I try to avoid this if possible and make do with a single shot.

12. What mistakes can be made and how can they be avoided?
- Improperly cleaned filters (smudges),
- Shaky image (inadequate tripod),
- Incorrect exposure (miscalculated, histogram not observed),
- Incorrectly positioned polarizing filter (dark spots in the image; polarizing filter should always be aligned with the sky. If you rotate it too much, the blue in the sky quickly becomes splotchy) or
- Incorrect filters (cheap filters made of simple plastic bought from online portals, which often show extreme color shifts – often towards magenta or green – or strong vignetting).
However, in 80 to 90 percent of cases, the biggest mistake is actually that photographers use an unsuitable tripod.
It should be a really stable model, preferably a very good carbon tripod, that is also light enough to take on longer tours. The tripod head should also be stable enough to hold the mounted camera firmly in position.
Tip: You can easily spend at least 400 Euros on a truly suitable carbon tripod, but it is a very worthwhile and necessary investment, especially if you want to successfully take long exposures and do landscape photography.

Share:
Basic Knowledge of Light Shapers: All About Softboxes, Beauty Dishes, Octaboxes & Co.
Portraits like Martin Schoeller's: what makes them so special